This page presents the procedure to activate the Ophidia OpenId Connect interface in Ophidia Server.
Basically this interface implements an authentication / authorization scheme compliant to OpenId Connect architecture.
Ophidia Server acts as an OpenId Connect client, so that it is able to verify end-user identity, as well as to obtain basic profile (e.g. organization name, email address of the user, etc.), by sending a REST request to the identity provider (whose hostname is represented by openid.hostname in this description). The user is assumed to be registered at this server or at another trusted identity provider.
Before accessing Ophidia, the user has to forge a temporary access token, signed by the authorization server, to authorize Ophidia Server to access its profile information. Then, the user attaches the token to JSON Requests to be submitted on behalf of the credentials and sends them to Ophidia Server.
Token format is compliant to RFC 7519 JSON Web Token and includes header, payload and signature separated by dots. An example of (decoded) payload is:
{
  "sub": "12345678-9abc-def0-1234-56789abcdef0",
  "iss": "https://localhost/",
  "exp": 1510942956,
  "iat": 1510939356,
  "jti": "01234567-89ab-cdef-0123-456789abcdef"
}
where
The server uses the token:
User authentication relies on the token validity. A token is considered valid if
The authorization procedure is quite flexible and involves a two-step process:
it can be summarized as follows:
The steps 1 and 2 correspond to the authentication procedure. For the first step, Ophidia server exploits the library cjose to check token signature. The second step concerns sending a request to OpenId Connect userinfo endpoint of the authorization server to retrieve user profile. To this, Ophidia server submits a command like the following one:
curl -s -L -H "Authorization: Bearer ${ACCESS_TOKEN}" https://openid.hostname/userinfo
where ${ACCESS_TOKEN} indicates the token.
To avoid to send too requests to the authorization server, thus preventing it from possible denial-of-service attacks, any valid token and related user profile information are cached on the server for a configurable time period (e.g. 10 minutes) by means of parameter OPENID_TOKEN_CHECK_TIME of configuration file (see below). At the expiration of this period, the server automatically checks if the token has not been revoked (simply by retrieving the user profile again) and, if still valid, defers its cancellation.
To enable Ophidia server to perform the authorization procedure (steps 3-6), user profile needs to report the fields “sub” (subject identifier) and “organization_name”. Hence, the user has to grant Ophidia to
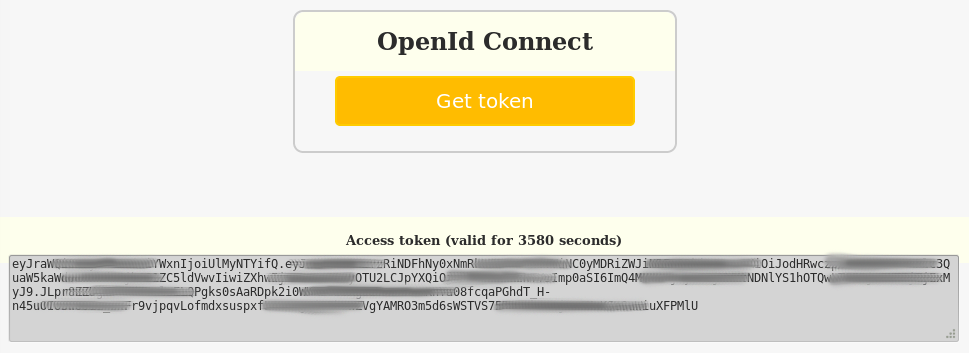
The scope offline is not necessary, but if the user grants this permission Ophidia can automatically update the access token before its expiration by means a refresh token released by the authorization server. To exploit this feature, the user has to forge the access token by means of Ophidia web interface, by logging in with OpenId (see the next figure).
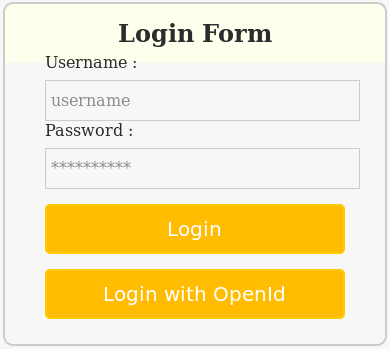
When a user logs in Ophidia using the mode “Login with OpenId”, he is redirected to openid.hostname to enable Ophidia to access user profile. If the user approves this request, Ophidia is able to forge a new access token as shown in th next figure. The same web page could be used to request a new token.
The user will use the token to access Ophidia with the terminal or PyOphidia without setting any additional credentials. For instance, For instance, consider a bash command that submit a generic Ophidia operator oph_operator with arguments “key1=value1” and “key2=value2”.
oph_term -H ${SERVER_HOST} -P ${SERVER_PORT} -u ${USERNAME} -p ${PASSWORD} -e "oph_operator key1=value1;key2=value2;"
The same command can be submitted by means of OpenId Connect in following way
oph_term -H ${SERVER_HOST} -P ${SERVER_PORT} -t ${ACCESS_TOKEN} -e "oph_operator key1=value1;key2=value2;"
where ${ACCESS_TOKEN} is obtained as described above.
Note that, in case the user has enabled the scope offline access, the token is transparently replaced by the terminal with a new token before the expiration, thus avoiding the user to repeat the procedure. Actually, the new token is forged by Ophidia server after the period equal to OPENID_TOKEN_TIMEOUT seconds (see below and configuration file) and, then, sent to the terminal within the next JSON Responses (piggybacking).
Ophidia assumes that an identity provider is already configured and acts as authorization server. In this description the hostname of this server is openid.hostname.
Download and install cjose. Version 0.4.1 has been tested.
mkdir -p /usr/local/ophidia/src
cd /usr/local/ophidia/src
wget https://github.com/cisco/cjose/archive/0.4.1.tar.gz
tar -xzf cjose-0.4.1.tar.gz
cd cjose-0.4.1
./configure --prefix=/usr/local/ophidia/extra
make
make install
The Ophidia Server OpenId Connect interface can be activated by setting the path to cjose installation folder as parameter of the tool configure (see installation from sources):
--with-cjose-path=/usr/local/ophidia/extra
OpenId Connect interface can be activated by appending the following parameters to the configuration file named $prefix/etc/server.conf.
OPENID_ENDPOINT=https://openid.hostname
OPENID_CLIENT_ID=01234567-89ab-cdef-0123-456789abcdef
OPENID_CLIENT_SECRET=s3cr3t
OPENID_TOKEN_TIMEOUT=3500
OPENID_TOKEN_CHECK_TIME=600
The parameters represent respectively:
Client id and client secret can be obtained by registering Ophidia Server as client at the authorization server.
