This page present the procedure to setup a single node Ophidia instance. The single node instance provides an all-in-one environment to quickly run analysis with the Ophidia Framework. This setup does not represent a production environment and is suggested only for training purposes. For a more HPC-oriented installation see the cluster setup page.
A ready-to-use VMI with this single-node setup is available at this link.
A single node with Linux OS is required (CentOS7 is recommended).
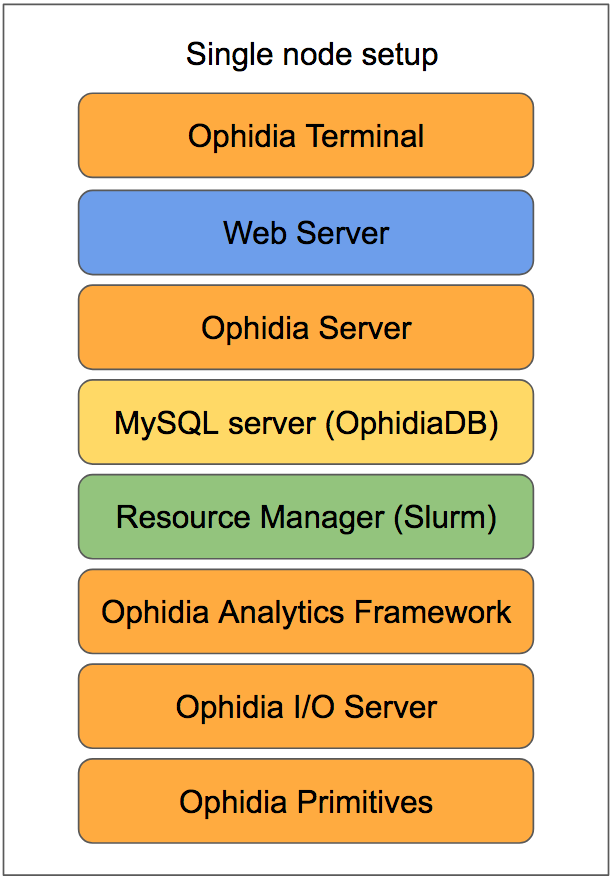
The following software components should be deployed on the same node (as shown in the diagram above):
First install the MySQL server, the resource manager and all the pre-requisite libraries as described in preliminary steps. Note that a web server is not strictly mandatory. Quick links to a sample setup procedures for the main steps are the following:
Then install the Ophidia components in the following order. Ophidia binaries are available for CentOS (RPMs) and Ubuntu (DEBs). Additionally, the components can be also installed from source code.
Default configuration can be used in the case of a sample instance, the only arguments which must be adapted concern the database configuration (namely the MySQL user and MySQL password chosen during the setup of MySQL server). In particular, in the following files:
Additionally, according to the setup of the resource manager used, you could need to update the resource manager scripts. For more information about specific configuration options and user management see configuration guides.
Besides these steps, the main component that need to be properly configured is the OphidiaDB. You can follow the basic setup in the following:
Finally, since all components are installed on the same machine and are listening on localhost interface, no additional security, network and firewall configuration are strictly required.
As ophidia user start the Ophidia terminal (specify the connection parameters of the running Ophidia Server):
oph_term -H 127.0.0.1 -u oph-test -p abcd -P 11732
Test the correctness of the entire installation launching a simple command:
>> oph_list level=2
Enjoy!
